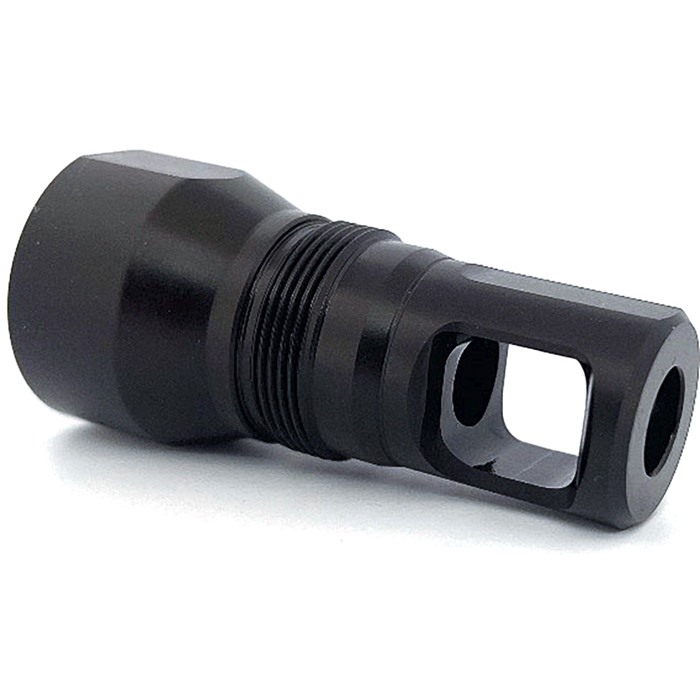
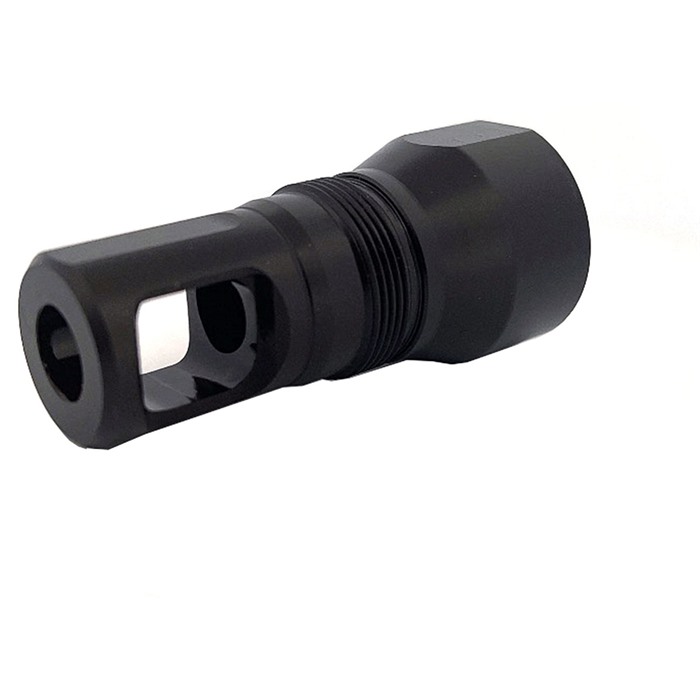
BLYAT MUZZLE BRAKES The Blyat attaches to our Atlas adapters, making them compatible with most suppressors on the market. These have 1 1/16”wrench flats on the rear; you can use a crows foot wrench, or our Atlas Wrench. The Blyat muzzle devices are designed to face mount on 24 and 26mm threads, helping to solve many common AK alignment issues. FEATURES: Black Nitride Finish Atlas and Atlas XL Compatible Plan B Compatible Shims Included Always use an alignment rod to ensure that the entire system is set up correctly. To install your muzzle device, first make sure all surfaces are clean. Dry fit your muzzle device on your barrel with and without shims, and ensure proper alignment. Once you have the muzzle device aligned, you can rockset and torque it onto your barrel, again checking alignment. Torque the muzzle device to approximately 30 ft lbs. When attaching your silencer to your muzzle device, ensure that all threads and tapers are clean. Torque the suppressor to 10 ft lbs. Ensure alignment again. Enjoy. The nitride finish does lead to a tighter seal, with that said, it is extremely important to torque and rockset your muzzle device to the barrel properly. If you are unsure of how to properly install and align your muzzle device or suppressor, take it to a qualified gunsmith.
BLYAT MUZZLE BRAKES Der Blyat wird an unseren Atlas-Adaptern befestigt, wodurch sie mit den meisten Schalldämpfern auf dem Markt kompatibel sind. Diese haben 1 1/16" Schraubenschlüssel-Flächen auf der Rückseite; du kannst einen Kranzschlüssel oder unseren Atlas-Werkzeug verwenden. Die Blyat-Mündungsgeräte sind so konzipiert, dass sie auf 24 und 26 mm Gewinde montiert werden, um viele gängige Ausrichtungsprobleme bei AKs zu lösen. MERKMALE: Schwarze Nitride-Oberfläche Atlas und Atlas XL kompatibel Plan B kompatibel Unterlegscheiben enthalten Verwende immer eine Ausrichtungsstange, um sicherzustellen, dass das gesamte System korrekt eingerichtet ist. Um dein Mündungsgerät zu installieren, stelle zunächst sicher, dass alle Oberflächen sauber sind. Probiere dein Mündungsgerät auf deinem Lauf mit und ohne Unterlegscheiben aus und stelle sicher, dass die Ausrichtung korrekt ist. Sobald du das Mündungsgerät ausgerichtet hast, kannst du es mit Rockset und Drehmoment auf deinem Lauf befestigen und erneut die Ausrichtung überprüfen. Ziehe das Mündungsgerät auf etwa 30 ft lbs fest. Wenn du deinen Schalldämpfer an dein Mündungsgerät anschließt, stelle sicher, dass alle Gewinde und Konen sauber sind. Ziehe den Schalldämpfer auf 10 ft lbs fest. Überprüfe erneut die Ausrichtung. Viel Spaß. Die Nitride-Oberfläche sorgt für eine engere Abdichtung, daher ist es äußerst wichtig, dein Mündungsgerät richtig am Lauf zu befestigen und zu rocksetten. Wenn du dir unsicher bist, wie du dein Mündungsgerät oder deinen Schalldämpfer richtig installieren und ausrichten kannst, bringe es zu einem qualifizierten Büchsenmacher.